A Classic Homemade Bread Recipe That Never Fails
There’s something incredibly comforting about baking your own bread at home, and this Amish-style white bread recipe is one of the best places to start. Known for its soft texture, fluffy crumb, and lightly sweet flavor, this bread is a timeless favorite in home kitchens. If you’re searching for a soft homemade sandwich bread, a beginner-friendly yeast bread recipe, or a traditional white bread loaf, this recipe delivers excellent results every time.
This bread is not only simple but also incredibly versatile. It works perfectly for sandwiches, toast, breakfast spreads, or even as a side with soups and stews. The slightly sweet taste sets it apart from regular white bread, making it a popular choice for families.
Why This Amish White Bread Recipe Is So Popular
This recipe has gained popularity because it combines:
- Easy-to-find ingredients
- Straightforward steps
- Soft, bakery-style texture
- Slightly sweet and rich flavor
Unlike artisan breads with crusty exteriors, this loaf focuses on a tender crumb and smooth texture, making it ideal for everyday use.
It is often searched as:
- Easy homemade white bread recipe
- Soft sandwich bread from scratch
- Fluffy yeast bread recipe for beginners
Understanding the Ingredients and Their Purpose
Each ingredient in this recipe plays an important role in achieving the perfect loaf.
1. All-Purpose Flour (6 to 7 cups)
Flour forms the base of the dough. It provides structure and determines the bread’s texture. Adding it gradually helps achieve a soft and manageable dough.
2. Warm Water (2 cups, 110°F–115°F)
Warm water activates the yeast and helps the dough come together. The temperature is very important:
- Too hot can kill the yeast
- Too cold will not activate it properly
3. Granulated Sugar (½ cup)
Sugar adds a mild sweetness and also feeds the yeast, helping it rise properly. This is what gives the bread its signature slightly sweet flavor.
4. Active Dry Yeast (1½ tablespoons)
Yeast is responsible for making the bread rise. It creates air bubbles in the dough, resulting in a light and fluffy texture.
5. Vegetable Oil (¼ cup)
Oil adds moisture and softness to the bread. It helps create a tender crumb and extends the shelf life.
6. Salt (2 teaspoons)
Salt enhances flavor and controls yeast activity. Without it, the bread would taste flat.
Tools You Will Need
To make this homemade white bread loaf, you’ll need:
- Large mixing bowl
- Wooden spoon or stand mixer
- Measuring cups and spoons
- Clean kitchen towel or plastic wrap
- Two 9×5-inch loaf pans
- Wire cooling rack
Step-by-Step Instructions with Detailed Explanation
Step 1: Activate the Yeast Properly
Start by pouring warm water into a large mixing bowl. Add sugar and stir until fully dissolved.
Sprinkle the yeast evenly over the surface and let it sit undisturbed for 5 to 10 minutes.
You’ll know the yeast is ready when:
- It becomes foamy
- A light bubbly layer forms on top
This step is essential because it ensures your yeast is active. Without proper activation, the bread will not rise.
Step 2: Prepare the Dough Mixture
Once the yeast is activated, add vegetable oil and salt to the mixture. Stir gently to combine.
Now begin adding flour gradually, about one cup at a time. Mix continuously using a wooden spoon or dough hook.
As you add more flour:
- The dough will start to thicken
- It will pull away from the sides of the bowl
- It should remain soft, not stiff
The goal is to create a smooth dough that is slightly tacky but not sticky.
Step 3: Kneading for Structure and Texture
Transfer the dough onto a lightly floured surface. Begin kneading using your hands.
Kneading helps:
- Develop gluten
- Improve elasticity
- Create a smooth texture
Knead for about 6 to 8 minutes until the dough becomes:
- Smooth
- Elastic
- Slightly springy when pressed
If using a stand mixer, knead for about 5 minutes on medium speed.
Step 4: First Rise (Proofing the Dough)
Shape the dough into a ball and place it in a lightly greased bowl. Turn it once so all sides are coated.
Cover the bowl with a towel or plastic wrap and place it in a warm, draft-free area.
Let the dough rise for 1 to 1½ hours or until it doubles in size.
This step is crucial for:
- Developing flavor
- Creating a soft texture
- Allowing the yeast to work fully
Step 5: Shaping the Bread Loaves
Once the dough has risen, gently punch it down to release trapped air.
Divide the dough into two equal portions.
Shape each portion into a loaf by:
- Flattening slightly
- Rolling into a log shape
- Tucking edges underneath
Place each loaf into a greased 9×5-inch pan.
Step 6: Second Rise for Perfect Volume
Cover the loaf pans loosely and let the dough rise again for 30 to 45 minutes.
During this time:
- The dough will expand
- It should rise slightly above the pan edges
This second rise ensures the bread has a light and fluffy texture.
Step 7: Baking the Bread to Golden Perfection
Preheat your oven to 350°F (175°C).
Once the dough has risen, place the pans in the oven and bake for 25 to 30 minutes.
You’ll know the bread is done when:
- The top is golden brown
- It sounds hollow when tapped
For extra softness, you can lightly brush the tops with butter after baking (optional).
Step 8: Cooling Before Slicing
Remove the bread from the pans immediately and place on a wire rack.
Allow it to cool completely before slicing.
This step prevents:
- Gummy texture
- Uneven slices
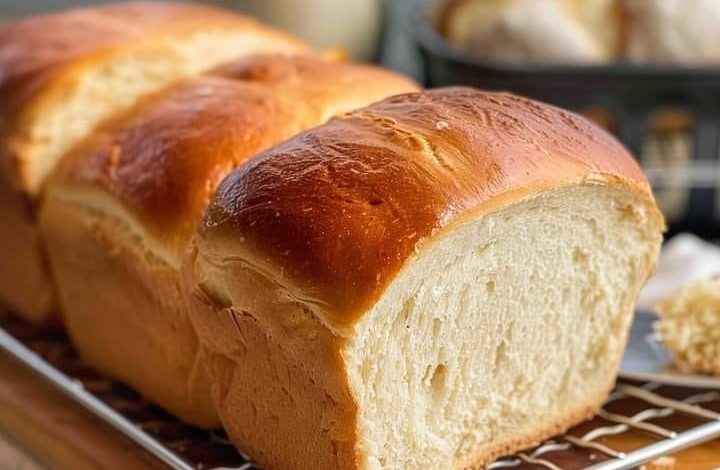
Texture and Flavor Profile
This Amish-style homemade bread has:
- Soft and fluffy interior
- Light golden crust
- Slightly sweet taste
- Smooth, tender crumb
It is perfect for:
- Sandwiches
- Toast with butter
- Jam or honey spreads
Expert Tips for Best Results
- Always use correct water temperature
- Do not add too much flour
- Allow full rising time
- Knead properly for structure
- Avoid overbaking
Storage and Shelf Life
- Store at room temperature for 3–4 days
- Keep in airtight container or bread bag
- Freeze for longer storage
To reheat:
- Warm in oven briefly
- Toast slices
Common Mistakes and Solutions
Bread didn’t rise
- Yeast may be inactive
- Water temperature incorrect
Bread is dense
- Too much flour
- Not enough kneading
Crust too hard
- Overbaking
- Oven too hot
Why You’ll Love This Recipe
This homemade sweet white bread is:
- Easy to make
- Family-friendly
- Perfect for beginners
- Better than store-bought
It brings warmth, comfort, and a homemade touch to any meal.
Part 2: Simple Recipe Version
Ingredients
- 6 to 7 cups all-purpose flour
- 2 cups warm water (110°F–115°F)
- ½ cup granulated sugar
- 1½ tablespoons active dry yeast
- ¼ cup vegetable oil
- 2 teaspoons salt
Directions
- Mix warm water and sugar in a bowl. Add yeast and let it sit until foamy (5–10 minutes).
- Add oil and salt, then gradually mix in flour to form a soft dough.
- Knead the dough for 6–8 minutes until smooth.
- Place in a greased bowl, cover, and let rise for 1–1½ hours until doubled.
- Punch down dough and divide into two parts. Shape into loaves.
- Place in greased loaf pans and let rise again for 30–45 minutes.
- Bake at 350°F (175°C) for 25–30 minutes until golden brown.
- Remove from pans and cool completely before slicing.
