A Warm and Comforting Tuna Sandwich Everyone Loves
Few comfort foods are as simple, satisfying, and nostalgic as a classic tuna melt sandwich. With crispy golden bread, creamy tuna filling, and perfectly melted cheese, this easy sandwich recipe has remained a favorite for generations. It is quick to prepare, budget-friendly, and incredibly comforting, especially during chilly afternoons or busy weeknights.
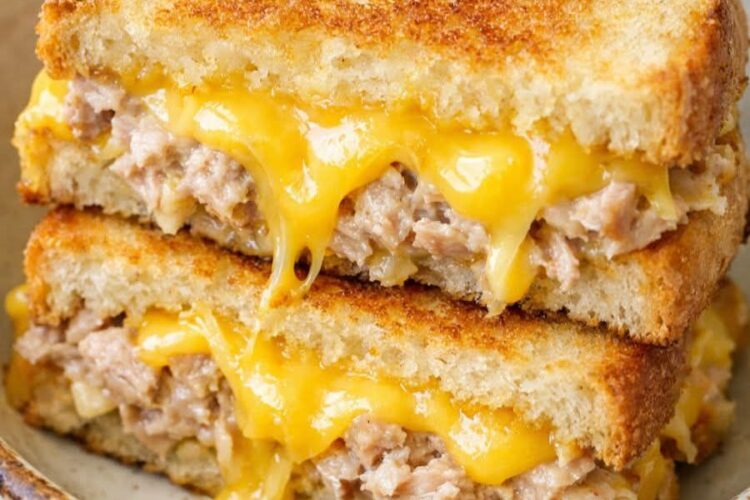
This easy tuna melt recipe combines pantry staples into a hot sandwich that tastes rich, creamy, buttery, and savory in every bite. The crispy toasted bread contrasts beautifully with the soft tuna filling and gooey melted cheese, creating a restaurant-style sandwich using only a handful of ingredients.
Perfect for quick lunches, simple dinners, after-school meals, or cozy weekend snacks, this cheesy tuna sandwich is one of the easiest homemade comfort food recipes you can make.
Whether paired with soup, salad, chips, or pickles, this tuna melt delivers warm homemade flavor with minimal effort.
Why This Tuna Melt Recipe Is So Popular
1. Fast and Easy to Make
One of the biggest reasons people love tuna melts is their simplicity. The recipe takes only minutes to prepare and cook, making it ideal for busy schedules.
2. Budget-Friendly Ingredients
Using canned tuna, sandwich bread, mayonnaise, and cheese makes this an affordable meal that still feels filling and satisfying.
3. Perfect Comfort Food
Warm melted cheese and toasted buttery bread create the kind of cozy comfort food people crave during cold weather or long days.
4. Great for Lunch or Dinner
This sandwich works equally well as a quick lunch, easy dinner, or late-night snack.
5. Family-Friendly Flavor
Children and adults both enjoy the creamy tuna filling and cheesy toasted bread combination.
The Secret to the Perfect Tuna Melt
The best tuna melt sandwiches balance creamy filling, melted cheese, and crispy bread without becoming soggy.
A few simple techniques help create the perfect texture:
- Drain tuna thoroughly to prevent watery filling
- Use enough mayonnaise for creaminess without overloading
- Cook over medium heat for even browning
- Toast slowly so cheese melts completely
- Butter the bread exterior for extra crispiness
When done correctly, the bread becomes golden and crunchy while the inside stays creamy and warm.
Understanding the Main Ingredients
Tuna
Tuna is the heart of the sandwich. Canned tuna provides savory flavor, protein, and convenience.
For best results:
- Use well-drained tuna
- Break it apart with a fork for even texture
- Choose chunk light or solid white tuna based on preference
Tuna creates a creamy filling when mixed with mayonnaise.
Mayonnaise
Mayonnaise adds moisture and richness to the filling.
Its creamy texture:
- Prevents dryness
- Helps bind the tuna together
- Adds smooth flavor
You can adjust the amount depending on whether you prefer a lighter or creamier sandwich.
Sandwich Bread
Classic sandwich bread creates the perfect crispy exterior while remaining soft inside.
Popular choices include:
- White sandwich bread
- Sourdough bread
- Texas toast
- Whole wheat bread
- Brioche slices
The bread becomes beautifully golden when toasted in a skillet.
Cheese
Cheese transforms a tuna sandwich into a tuna melt.
American cheese melts smoothly and creates a creamy texture, while mild cheddar adds slightly sharper flavor.
Other excellent options include:
- Swiss cheese
- Monterey Jack
- Provolone
- Mozzarella
Why Buttering the Bread Matters
Although optional, lightly buttering the outside of the bread dramatically improves flavor and texture.
Butter helps:
- Create a golden crust
- Add rich flavor
- Increase crispiness
- Prevent dryness
This small step gives the sandwich a diner-style finish.
Expert Tips for the Best Tuna Melt Sandwich
Drain Tuna Thoroughly
Too much moisture can make the sandwich soggy.
Use Medium Heat
Cooking slowly allows the cheese to melt fully before the bread burns.
Press Lightly While Cooking
Gentle pressure helps create even browning and better cheese melting.
Don’t Overfill the Sandwich
Too much filling may spill out during cooking.
Flip Carefully
Use a wide spatula for easier flipping and less mess.
Flavor Variations You Can Try
This simple tuna melt recipe can easily be customized.
Tomato Tuna Melt
Add tomato slices for extra freshness and flavor.
Crunchy Tuna Sandwich
Mix diced celery or pickles into the tuna filling.
Spicy Tuna Melt
Add jalapeños or hot sauce for heat.
Garlic Herb Version
Mix garlic powder and herbs into the tuna mixture.
Extra Cheesy Melt
Use shredded cheddar along with sliced cheese for richer texture.
Best Side Dishes to Serve With Tuna Melts
Tuna melts pair beautifully with many sides.
Classic Pairings Include:
- Potato chips
- French fries
- Pickles
- Tomato soup
- Chicken noodle soup
- Green salad
- Coleslaw
- Carrot sticks
- Pasta salad
The warm sandwich and crunchy or fresh sides create a balanced meal.
Why Tuna Melts Are the Ultimate Comfort Food
Comfort food recipes often combine warmth, simplicity, and nostalgia. Tuna melts check every box.
The smell of bread toasting in butter and cheese melting in a skillet creates a cozy kitchen atmosphere. Many people associate tuna melts with homemade lunches, diner meals, or comforting childhood recipes.
Their simplicity is part of their charm.
Health Benefits of Tuna Sandwiches
Tuna melts are not only delicious but also provide nutritional benefits.
Tuna Provides:
- Protein
- Omega-3 fatty acids
- Vitamins and minerals
Cheese Adds:
- Calcium
- Protein
- Rich flavor
For a lighter version, whole-grain bread and reduced-fat mayonnaise may be used.
Storage and Reheating Tips
Refrigeration
Store leftover tuna filling separately in the refrigerator for up to 2 days.
Reheating
Reheat sandwiches in a skillet or oven for best crispiness.
Avoid Microwaving
Microwaving can make the bread soft instead of crispy.
Common Mistakes to Avoid
Cooking Over High Heat
High heat burns bread before cheese melts.
Using Wet Tuna
Excess moisture leads to soggy sandwiches.
Skipping Butter
Without butter, the bread may toast unevenly and lack flavor.
Overstuffing the Sandwich
Too much filling makes flipping difficult.
Perfect Occasions for Tuna Melts
This easy sandwich recipe works for many situations:
- Quick weekday lunches
- Easy dinners
- School breaks
- Weekend comfort meals
- Rainy day food
- Budget-friendly meals
- Late-night snacks
Because it requires very little preparation, it is ideal for busy households.
Why Simple Recipes Often Taste the Best
Some of the most satisfying meals use only a few ingredients prepared well. This tuna melt proves that comfort food does not need to be complicated.
The balance of crispy bread, creamy tuna, and melted cheese creates rich flavor and satisfying texture using ingredients many people already have at home.
Final Thoughts
This crispy cheesy tuna melt sandwich is a timeless comfort food recipe that transforms simple pantry staples into a warm and satisfying meal. The creamy tuna filling, melted cheese, and buttery toasted bread create the perfect combination of texture and flavor.
Quick, affordable, and deeply comforting, this easy tuna melt recipe is perfect for cozy lunches, simple dinners, or whenever you want a homemade hot sandwich without spending hours in the kitchen.
Once you try this classic sandwich, it is likely to become a regular favorite in your meal rotation.
Part 2 – Simple Recipe Card
Easy 4-Ingredient Tuna Melt Sandwich
Servings
2 sandwiches
Ingredients
- 1 (5-ounce) can tuna, well drained
- 1/4 cup mayonnaise
- 4 slices sandwich bread
- 4 slices yellow cheese (American or mild cheddar)
Optional Additions
- Butter for crispier bread
- Black pepper
- Tomato slices
- Pickles or celery for crunch
Instructions
Step 1: Make the Tuna Filling
Place drained tuna into a small bowl.
Use a fork to break it apart.
Add mayonnaise and mix until smooth and creamy.
Step 2: Assemble the Sandwiches
Lay out 4 slices of bread.
Spread the tuna mixture evenly onto 2 slices.
Spread close to the edges for even bites.
Step 3: Add Cheese
Place 2 slices of cheese over the tuna mixture on each sandwich.
Top with remaining bread slices.
Step 4: Toast the Sandwiches
Heat a skillet over medium heat.
Lightly butter the outside of each sandwich if desired.
Cook sandwiches for 3–4 minutes per side until golden brown and crispy.
Cook until cheese is fully melted.
Step 5: Serve Hot
Remove from skillet.
Slice in half if desired and serve immediately.
Serving Suggestions
Serve your tuna melt with:
- Potato chips
- Pickles
- Carrot sticks
- Green salad
- Tomato soup
- Chicken noodle soup
Helpful Tips
- Drain tuna well for the best texture
- Cook slowly over medium heat
- Butter the bread for extra crispiness
- Use a spatula to press lightly while cooking
- Serve immediately while hot and melty
