There’s something undeniably comforting about classic recipes that have been passed down through generations. Dishes like pasta salad bring back memories of family picnics, backyard barbecues, and festive potlucks where food becomes the centerpiece of connection. Among the many variations available today, a layered pasta salad recipe stands out not just for its taste, but also for its stunning presentation and convenience.
This modern take on a traditional favorite combines vibrant vegetables, tender pasta, savory protein, and a creamy tangy dressing—all beautifully arranged in layers. The result is a dish that is visually appealing, incredibly satisfying, and ideal for making ahead of time. If you’re searching for an easy summer pasta salad, make-ahead picnic recipe, or a creamy layered salad for parties, this dish checks all the boxes.
Why This Layered Pasta Salad is a Must-Try
Unlike basic tossed salads, a layered version offers a unique experience. Each ingredient is carefully stacked, allowing flavors to stay distinct until serving time. This method not only preserves freshness but also enhances texture. The crisp lettuce remains crunchy, the pasta stays tender, and the dressing gently seeps through the layers over time, creating a harmonious blend of flavors.
Another advantage is its convenience. This is a perfect make-ahead salad recipe, meaning you can prepare it hours in advance—ideal for busy hosts or anyone planning an event. Simply assemble, refrigerate, and toss when ready to serve.
The Flavor Profile: Creamy, Tangy, and Savory
What makes this salad truly irresistible is the dressing. A rich combination of creamy and tangy ingredients creates a balanced flavor that complements the freshness of the vegetables and the saltiness of the ham. The slight sweetness and hint of mustard add depth, while seasoning ties everything together.
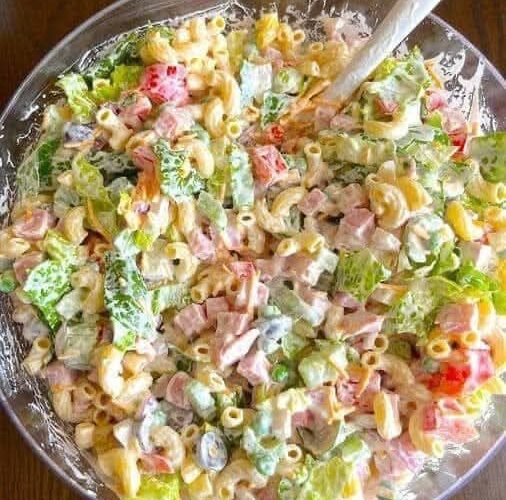
The layers themselves offer a mix of textures and tastes:
- Crunchy greens for freshness
- Soft pasta for heartiness
- Crisp vegetables for bite
- Savory ham for protein
- Cheese and olives for richness and bold flavor
Every spoonful delivers a complete experience.
Choosing the Right Ingredients for Best Results
To create the best homemade pasta salad, ingredient quality matters. Here are some helpful tips:
- Pasta: Use small shapes like macaroni, shells, or rotini. Cook until just tender (al dente) to prevent mushiness.
- Lettuce: Crisp varieties like romaine work best as they hold up well under layers.
- Vegetables: Fresh, colorful veggies enhance both taste and visual appeal. You can also add cucumbers or cherry tomatoes for extra freshness.
- Protein: Diced ham gives a smoky, savory flavor, but cooked chicken or turkey can also be used if preferred.
- Cheese: Sharp cheddar adds a bold taste, but mozzarella or Colby Jack are great alternatives.
- Olives: These provide a salty contrast—black olives are mild, but green olives can add a stronger kick.
Tips for Perfect Layering
Creating clean, defined layers is key to the presentation:
- Start with a base of lettuce to keep the bottom fresh and prevent sogginess.
- Add pasta as the second layer to absorb some dressing later.
- Continue layering vegetables, protein, and extras evenly.
- Spread dressing gently across the top rather than mixing it in immediately.
- Finish with cheese for a rich topping.
Using a clear glass bowl or trifle dish enhances the visual effect, making it a centerpiece-worthy dish.
Make-Ahead Convenience
One of the biggest benefits of this easy pasta salad for parties is its ability to be prepared in advance. In fact, letting it chill for several hours (or overnight) allows the flavors to meld beautifully. This makes it a go-to option for:
- BBQ gatherings
- Holiday dinners
- Potluck events
- Meal prep for busy weeks
Just remember to toss it gently before serving so every bite is coated in that creamy dressing.
Customization Ideas for a Unique Twist
While this recipe is delicious as-is, you can easily adapt it to suit your taste:
- Add boiled eggs for extra protein
- Include sweet corn for a hint of sweetness
- Mix in fresh herbs like parsley or dill for brightness
- Use Greek yogurt instead of sour cream for a lighter version
This flexibility makes it one of the best customizable pasta salad recipes you can have in your collection.
Storage and Serving Tips
Store leftovers in an airtight container in the refrigerator for up to 2 days. Since the salad contains dairy-based dressing, avoid leaving it out at room temperature for long periods.
For serving:
- Toss just before serving to redistribute dressing
- Garnish with extra cheese or herbs if desired
- Serve chilled for best taste
Final Thoughts
This layered pasta salad is more than just a side dish—it’s a celebration of flavor, texture, and tradition. Whether you’re hosting a summer cookout or preparing a quick family meal, this dish delivers both convenience and crowd-pleasing appeal. Its creamy dressing, colorful layers, and satisfying ingredients make it a standout recipe you’ll return to again and again.
Part 2: Simple Layered Pasta Salad Recipe
Creamy Dressing Ingredients
- ½ cup mayonnaise
- ¾ cup sour cream
- 2 teaspoons white wine vinegar
- 1 teaspoon sugar
- 2 teaspoons Dijon mustard
- ½ teaspoon Worcestershire sauce
- ½ teaspoon salt
- ½ teaspoon black pepper
Salad Ingredients
- 3 cups cooked and drained macaroni pasta
- 3 cups chopped romaine lettuce
- ½ red bell pepper, diced
- ¼ cup finely chopped red onion
- ½ cup thawed green peas
- ⅓ cup chopped celery
- 1½ cups diced ham
- ⅓ cup sliced black olives
- ½ cup shredded cheddar cheese
Easy Preparation Steps
- In a small bowl, whisk together mayonnaise, sour cream, vinegar, sugar, Dijon mustard, Worcestershire sauce, salt, and black pepper until smooth.
- In a large clear bowl or serving dish, layer the ingredients in this order: lettuce, pasta, bell pepper, onion, peas, celery, ham, and olives.
- Spread the prepared dressing evenly over the top layer.
- Sprinkle shredded cheese on top.
- Cover tightly and refrigerate for at least 5 hours (or overnight for best flavor).
- Toss gently before serving and enjoy chilled.
