If you’re searching for a quick dessert recipe, a no-bake fudge, or an easy peanut butter chocolate treat, this simple yet indulgent fudge recipe is exactly what you need. Made with just two core ingredients, this recipe is perfect for busy days, last-minute dessert cravings, or holiday sweet trays when time is limited but expectations are high.
This 2-ingredient peanut butter fudge is one of the most searched and loved recipes online because it delivers rich, creamy, melt-in-your-mouth texture with almost no effort. It’s the kind of recipe that proves you don’t need complicated steps or long ingredient lists to create something truly delicious.
Whether you’re preparing for a festive occasion, assembling a dessert platter, or simply treating yourself, this fudge is a guaranteed crowd-pleaser.
Why This No-Bake Fudge Recipe Is So Popular
In today’s fast-paced world, recipes that are quick, easy, and foolproof are always trending. Keywords like “no-bake desserts,” “easy fudge recipe,” “quick chocolate sweets,” and “2-ingredient desserts” consistently rank high because people want maximum flavor with minimal effort.
This recipe stands out because:
- It uses only two main ingredients
- Requires no oven or baking skills
- Takes just 5 minutes to prepare
- Needs only a short chilling time
- Is perfect for beginners
- Ideal for holiday dessert trays and gifting
It’s one of the easiest ways to make a homemade chocolate peanut butter dessert without stress.
Flavor Profile: Rich, Creamy, and Perfectly Balanced
This fudge delivers a luxurious taste experience that feels far more complex than its ingredient list suggests.
- Peanut butter adds a smooth, nutty richness
- Chocolate chips bring sweetness and depth
- Together, they create a perfectly balanced sweet-and-salty flavor
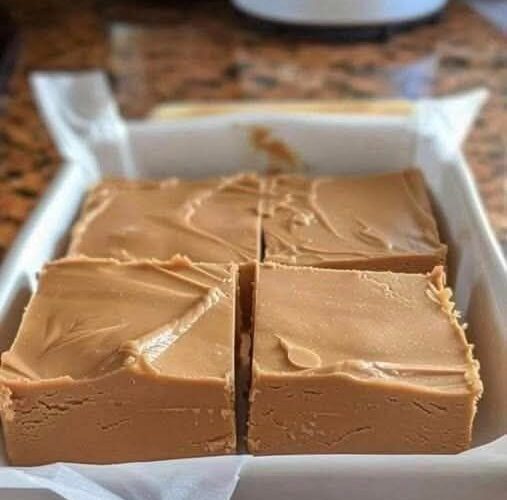
The texture is soft yet firm, creamy yet sliceable—everything you want in a classic fudge.
The Magic of Two Simple Ingredients
What makes this recipe special is how these two ingredients work together.
When melted and combined:
- The chocolate provides structure as it firms up when chilled
- The peanut butter keeps the texture creamy and smooth
- The mixture sets into a rich, sliceable consistency
This natural combination eliminates the need for condensed milk, butter, or sugar syrups often found in traditional fudge recipes.
Why This Is the Perfect Last-Minute Dessert
One of the biggest advantages of this recipe is speed. You can prepare it in minutes and let the refrigerator do the rest.
This makes it ideal for:
- Unexpected guests
- Holiday baking emergencies
- Late-night dessert cravings
- Quick homemade gifts
Unlike baked desserts, there’s no risk of overcooking or complicated techniques.
Choosing the Right Ingredients for Best Results
Since this recipe is so simple, ingredient quality matters.
Peanut Butter
Use smooth, creamy peanut butter for best texture. It should be well-stirred and not overly oily or dry.
Chocolate Chips
Semi-sweet chocolate chips are ideal because they balance sweetness with a slight bitterness, preventing the fudge from becoming overly sugary.
Melting Tips for Smooth Fudge
Melting is the most important step in this recipe. Done correctly, it ensures a silky-smooth texture.
- Heat in short intervals (30 seconds)
- Stir between each interval
- Avoid overheating, which can cause separation
The goal is to gently melt, not cook.
How to Get Perfect Fudge Texture Every Time
For best results:
- Mix thoroughly until completely smooth
- Pour immediately into the prepared pan
- Spread evenly for consistent thickness
Once chilled, the fudge should be firm but still soft enough to cut easily.
Why Chilling Is Essential
After pouring the mixture into the pan, refrigeration is necessary to set the fudge.
During this time:
- Chocolate solidifies
- Structure develops
- Flavors meld together
Typically, 2–3 hours is enough, but longer chilling results in cleaner slices.
Cutting and Serving Like a Pro
To get neat, bakery-style squares:
- Use a sharp knife
- Wipe the blade between cuts
- Cut into even portions
You can make small bite-sized cubes or larger dessert squares depending on preference.
Creative Ways to Serve This Fudge
This versatile dessert can be presented in many ways:
- On holiday dessert platters
- Wrapped as edible gifts
- Paired with coffee or tea
- Served as an after-dinner treat
It’s also a great addition to party dessert tables.
Optional Flavor Enhancements (Without Changing Base Ingredients)
While the classic version is perfect, you can enhance it with small additions:
- A pinch of sea salt for contrast
- A few drops of vanilla extract for depth
- Crushed nuts sprinkled on top
- Swirls of extra melted chocolate
These additions elevate the flavor while keeping the recipe simple.
Storage and Shelf Life
This fudge stores well, making it perfect for meal prep or gifting.
- Keep in an airtight container
- Store in the refrigerator for up to 2 weeks
- Can be frozen for longer storage
For best texture, serve slightly chilled or at room temperature.
Why This Recipe Is Perfect for Beginners
If you’re new to cooking or baking, this recipe is an excellent starting point.
- No baking required
- No special equipment needed
- Minimal steps
- High success rate
It’s one of the easiest ways to build confidence in the kitchen.
A Classic Treat with Modern Simplicity
Fudge has been a beloved dessert for generations, but traditional methods often require candy thermometers and precise timing. This modern version simplifies everything while keeping the same rich flavor.
It’s proof that simple recipes can still deliver incredible results.
A Dessert That Brings Joy Instantly
There’s something deeply satisfying about making a dessert in minutes and enjoying it a few hours later. This recipe captures that joy perfectly.
From melting the ingredients to slicing the final squares, every step is easy and rewarding.
Final Thoughts: Simple, Sweet, and Always Delicious
This easy peanut butter chocolate fudge recipe is everything a great dessert should be—quick, delicious, and reliable. It’s perfect for beginners, busy families, and anyone who loves chocolate and peanut butter.
Once you try it, it’s likely to become a regular in your dessert rotation.
Source:
Inspired by classic homemade fudge recipes and modern no-bake dessert techniques widely shared in home cooking traditions and quick dessert innovations.
Part 2: Simple Step-by-Step Recipe (Quick Version)
🕒 Quick Overview
Prep Time: 5 minutes
Chill Time: 2–3 hours
Total Time: ~2 hours 10 minutes
🛒 Ingredients
- 2 cups (about 16 ounces) creamy peanut butter
- 2 cups (about 12 ounces) semi-sweet chocolate chips
👨🍳 Instructions
Step 1: Prepare the Pan
Line an 8×8-inch square pan with parchment paper, leaving extra on the sides for easy removal.
Step 2: Combine Ingredients
Place peanut butter and chocolate chips in a microwave-safe bowl.
Step 3: Melt
Heat in 30-second intervals, stirring each time, until fully melted and smooth.
Step 4: Transfer to Pan
Pour the mixture into the prepared pan and spread evenly.
Step 5: Chill
Refrigerate for 2–3 hours or until firm.
Step 6: Cut and Serve
Lift out using parchment paper, cut into squares, and serve.
💡 Helpful Tips
- Do not overheat while melting
- Stir well for smooth texture
- Chill completely before cutting
- Store in fridge in airtight container
