Creating the perfect poached egg is often seen as a culinary milestone. It looks simple—just an egg cooked in water—but achieving that smooth, restaurant-quality finish requires precision, understanding, and a bit of practice. Whether you’re preparing a healthy breakfast, building a brunch plate, or upgrading your meal prep routine, learning how to poach eggs properly will instantly elevate your cooking skills.
This comprehensive guide is designed to help you master easy poached eggs at home, using proven techniques that align with professional kitchen standards. By the end, you’ll be able to produce eggs with a delicate white, a rich, runny yolk, and a clean, elegant shape every single time.
What Defines a Flawless Poached Egg?
A properly cooked poached egg is all about balance—texture, structure, and appearance working together in harmony. Here’s what you’re aiming for:
- A neat, oval-shaped egg white that wraps smoothly around the yolk
- A fully enclosed center with no breaks or leaks
- A tender, silky white—not rubbery or tough
- A soft, golden yolk that flows when cut
- No thin, stringy strands floating in the water
In professional cooking, consistency matters more than speed. A great poached egg should hold its shape naturally without needing trimming or correction.
The Science Behind Poaching Eggs
To truly master this technique, it helps to understand what’s happening beneath the surface. Eggs respond to heat in very specific ways, and controlling temperature is the key to success.
How Egg Whites Cook
Egg whites are made up of proteins that change structure when heated:
- Around 60°C: whites begin to thicken
- Around 65°C: they form a soft gel
- Between 70–80°C: they fully set
- Above 90°C: they become firm and rubbery
The goal is to gently cook the whites until they are set but still soft.
How the Yolk Reacts
The yolk behaves differently:
- Around 60°C: slightly thickened
- Around 65°C: creamy and custard-like
- Above 70°C: starts to firm up
For a classic poached egg, you want the yolk to remain soft and rich—not overcooked.
Why Poaching Works So Well
Unlike frying, poaching uses water as a gentle heat source. This allows for:
- Even cooking without direct heat
- Better texture control
- A lighter, healthier result (no added oil required)
Choosing the Best Eggs for Poaching
Not all eggs behave the same in water. Freshness plays a huge role in the final result.
Fresh Eggs (Highly Recommended)
- Thick whites that stay compact
- Hold shape easily
- Produce the cleanest results
Slightly Older Eggs
- Whites are looser
- May require vinegar or straining
- Still usable with proper technique
Older Eggs (Avoid If Possible)
- Very runny whites
- Spread uncontrollably in water
- Difficult to shape without extra steps
Essential Tools for Perfect Poached Eggs
You don’t need fancy equipment, but having the right tools makes a big difference:
Deep Saucepan
A pot with good depth allows the egg to float and form properly without sticking.
Slotted Spoon
Helps lift the egg out while draining excess water instantly.
Small Bowl or Ramekin
Cracking the egg into a bowl first gives you better control when adding it to water.
Kitchen Thermometer
Useful for maintaining the ideal temperature range (80–85°C), especially for beginners.
Preparing the Water Correctly
Water preparation is one of the most important steps in poaching eggs.
Ideal Water Depth
Use enough water so the egg can float freely—about 1.5 to 3 liters for a few eggs.
Perfect Temperature Range
- Aim for 80°C to 85°C
- Water should be hot but not boiling
Visual Clues
- Small bubbles at the bottom of the pot
- Occasional gentle movement
- No rapid boiling
Boiling water is too aggressive and will break apart the egg, creating messy strands.
The Role of Vinegar in Poaching
Adding vinegar is optional, but it’s commonly used for better results.
What Vinegar Does
- Lowers the pH of the water
- Helps egg whites coagulate faster
- Keeps the egg compact
Recommended Amount
- About 1 teaspoon per liter of water
Things to Watch
- Too much vinegar can affect taste
- Use just enough for structure
Step-by-Step Technique Explained
Step 1: Prepare the Egg
Crack the egg into a small bowl. This helps you check the yolk and prevents breakage.
Optional: Remove very watery whites for a cleaner shape.
Step 2: Stabilize the Water
Bring the water to a gentle simmer, then reduce heat slightly before adding the egg.
Step 3: Create a Gentle Swirl (Optional)
Stir the water to form a mild vortex. This helps wrap the white around the yolk.
Step 4: Add the Egg Carefully
Lower the bowl close to the water surface and gently slide the egg in.
Avoid dropping from a height, as it can break the yolk.
Step 5: Let It Cook in Stages
- First 30 seconds: whites begin forming
- 1–2 minutes: egg holds shape
- 2–3 minutes: structure stabilizes
- Final stage: texture develops based on timing
Cooking Time Guide for Different Textures
- Soft poached egg: 2.5–3.5 minutes (runny yolk)
- Medium poached egg: 3.5–4.5 minutes (creamy yolk)
- Firm poached egg: 5–6 minutes (set yolk)
- Fully cooked: 6+ minutes (solid yolk)
Professional Batch Cooking Method
In restaurants, multiple eggs are often cooked at once:
- Use a large pot with stable temperature
- Add eggs one after another
- Maintain consistent heat
- Use a slotted spoon rotation system
Holding Technique
Partially cook eggs, place in ice water, then reheat in hot water before serving.
Advanced Technique: Straining for Perfect Shape
For a clean, elegant presentation:
- Crack egg into a fine sieve
- Let excess liquid drain
- Transfer to bowl
- Poach as usual
Result: smooth, compact eggs with no loose strands.
Alternative Methods
Sous Vide Style
- Cook egg in shell at 63–64°C
- Time: 45–75 minutes
- Result: ultra-creamy texture
Microwave Method
- Quick but less reliable
- Risk of uneven cooking or bursting
Common Mistakes and How to Fix Them
- Egg spreads too much → use fresher eggs or vinegar
- Stringy whites → reduce water movement
- Egg sticks → increase water depth
- Yolk breaks → handle gently using bowl method
- Rubbery texture → avoid overcooking
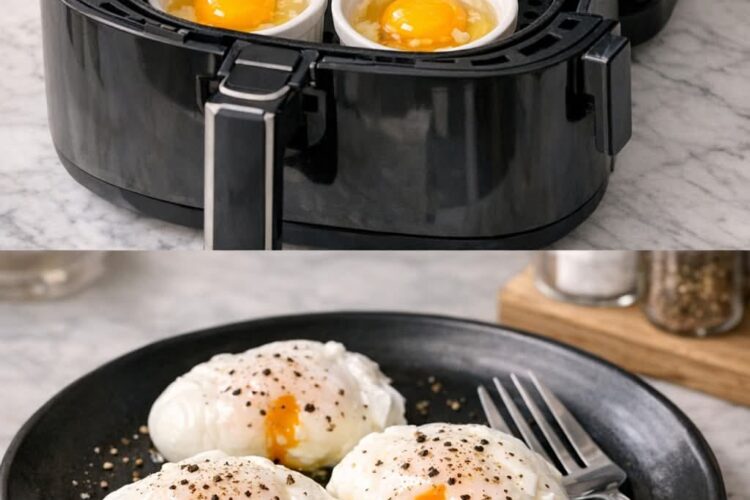
Serving Ideas for Poached Eggs
Classic Breakfast
Serve on toast with butter, salt, and pepper.
Protein Bowl
Add to rice, grains, or vegetables for a balanced meal.
Sauce-Based Dishes
Top with creamy sauces like hollandaise or yogurt-based dressings.
Flavor Enhancements
After cooking, you can add:
- Black pepper for aroma
- Chili flakes for heat
- Butter for richness
- Soy sauce for umami
Global Serving Styles
- South Asian style: served with roti or paratha and spices
- Western style: used in eggs Benedict
- Asian style: placed over rice with soy and sesame
Expert Tips for Consistency
- Always test water temperature
- Use a timer instead of guessing
- Don’t overcrowd the pot
- Practice different methods
- Use eggs of similar size for even cooking
Final Thoughts
Perfecting poached eggs is less about luck and more about understanding technique. Once you control temperature, timing, and handling, you’ll consistently achieve results that look and taste like they came from a professional kitchen.
This method proves that even the simplest ingredients can produce something elegant and satisfying when prepared correctly.
Part 2: Simple Perfect Poached Eggs Recipe
Ingredients
- Fresh eggs (as needed)
- Water (enough to fill pot)
- 1 teaspoon vinegar (optional, per liter of water)
- Salt and black pepper (to taste)
Instructions
- Fill a deep saucepan with water and heat to a gentle simmer (not boiling).
- Add vinegar if using.
- Crack each egg into a small bowl.
- (Optional) Create a gentle swirl in the water.
- Carefully slide the egg into the water.
- Cook for:
- 2.5–3.5 minutes for soft yolk
- 3.5–4.5 minutes for medium
- 5–6 minutes for firm
- Remove with a slotted spoon.
- Drain excess water and season with salt and pepper.
- Serve immediately.
